Distillation Experiment: Distilling Water at Home (Minimal Materials)


Introduction: Distillation Experiment: Distilling Water at Home (Minimal Materials)

***Students, do not use a stove without your parents permission/supervision.***
In Grade 7, students learn about pure substances and mixtures. They learn about the particle theory of matter and how it explains the properties of these pure substances and mixtures. In particular, we learn about solutions. A solution is a mixture made up of parts with very similar properties and characteristics. Salt water, coffee, alloy metals are all solutions. The parts of a solution are very difficult to separate. Though not impossible!
We begin to learn about different types of filtration that can be used to separate solutions. The most common strategies involve making the solute or solvent change state. (ie. changing the solute from a solid to a liquid)
In this experiment students will learn about the filtration process of distillation. This experiment is designed for my students to do at home with as little materials as possible. There are some much better water distilling Instructables available, such as this one created by erbst . This instructbable is intended to be as simple as possible.
- 1 cup of water
- 1 Tablespoons of fine table salt
- One metal pot and lid
- One spatula (recommended)
- One water glass
Step 1: Create a Salt Water Solution

Fill a glass with 1 cup of water. Then add one table spoon of salt. To make a proper solution you should stir until the salt as been absorbed and is no longer visible. Give it a taste! Just make sure there is a sink nearby!
Step 2: Add to Pot and Boil

Add your salt water solution to a pot (I chose a large pot with a large surface area) with a lid. Close the lid. On high heat bring the water to a boil. Let your water boil, you should see some steam escaping, let it continue to boil for a minute or two. Then reduce the heat to low.
Step 3: Lift the Lid

**Be careful! The pot will be hot! If your pot has an exposed metal handle use over mitts or a tea towel**
Carefully lift the lid and turn it over in one smooth motion. You should see many water droplets have formed on the lid of the pot.
Step 4: Pour Water Into a Cup

Bring your lid over to a new glass. With a spatula, wipe the water droplets into the cup.
You may not get enough water on your first try. If not, return the lid to the pot and reheat. Repeat these steps until you have collected enough water to drink.
Step 5: Bottom's Up!

Enjoy the fruits of your labor!
Take a drink of the water you have collected, distilled rather!
What do you notice? How has the salt water solution separated?

Using Distillation to Purify Water

Please enable JavaScript

(Earth Science for ages 5+)
Did you know that the Earth is 70% water? It’s true, that’s why it is called the “Blue Planet.” Most of this water (97%) is saltwater , which people cannot drink or even use in their everyday life.
So how do we find enough freshwater on a planet with so much saltwater? Well, there are a few different ways to “purify” water to make it fresh and clean, one of which is called distillation.
In the video above, you can see how distillation occurs with just a bit of heat. Here’s what you’ll need:
Large bowl Small plastic cup Plastic cling wrap Water Salt Tape Rocks (or other weighted object) Adult supervision
- Start by adding some saltwater to your large bowl. Mix 2 tablespoons of salt per cup of water. There should be about 2 inches of saltwater in your bowl, or enough to allow the cup to float on top of it.
- Set your bowl in a sunny spot, either outside or near a window, where it can stay for several hours undisturbed. Set your plastic cup on top of the water in your bowl like a small boat. Do not let any water get into the cup.
- Using the plastic cling wrap, cover the bowl completely and tape the edges down to keep it secure.
- Finally, add the rocks or other weighted object to the top of the plastic cling wrap so the plastic slopes down toward the cup. Leave your bowl undisturbed for several hours, even up to a day.
- After several hours, check the plastic cup. What happened? Do you see water in the cup? Taste a small bit of the water. Is there salt in it?
When the heat from the sun warms the saltwater, it creates a small amount of water vapor gases under the plastic wrap. The salt is left behind in the bigger pool of saltwater, and the water vapor is made of freshwater.
When the sun is no longer shining directly on the bowl, this water vapor cools and condenses on the inside of the plastic wrap. Because the plastic wrap is sloped down toward the empty plastic cup, the water condensation drips slowly down into the cup, leaving you with freshwater in the cup and saltwater in the bowl.
This whole process is called distillation because the freshwater is distilled and purified from the saltwater.

- Science Notes Posts
- Contact Science Notes
- Todd Helmenstine Biography
- Anne Helmenstine Biography
- Free Printable Periodic Tables (PDF and PNG)
- Periodic Table Wallpapers
- Interactive Periodic Table
- Periodic Table Posters
- Science Experiments for Kids
- How to Grow Crystals
- Chemistry Projects
- Fire and Flames Projects
- Holiday Science
- Chemistry Problems With Answers
- Physics Problems
- Unit Conversion Example Problems
- Chemistry Worksheets
- Biology Worksheets
- Periodic Table Worksheets
- Physical Science Worksheets
- Science Lab Worksheets
- My Amazon Books
How to Make Distilled Water – 5 Easy Methods

Distilled water is water purified by condensing water vapor into liquid water. Usually, the distillation process involves boiling impure water and collected the condensed vapor in a fresh container. However, you can obtain distilled water from damp soil, plants, snow, and rain, too. You can distill water to make drinking water for emergencies or improve your tap water. Here are several methods for making distilled water yourself. Which one you choose depends on your situation and resources.
Distill Water Using a Stove or Fire
If you have a heat source, such as a stove or campfire, it’s better to distill impure water for drinking than to simply boil it. This is because boiling kills many pathogens, but doesn’t remove chemical impurities or kill certain bacterial spores. You can use this method with any water, including seawater, questionable tap water, or even water from a puddle. To distill water, you need a large container to hold the impure water, a smaller container that either floats in the larger one or can be propped up above the water level, and a rounded lid that fits the large container. The process goes much faster if you also have some ice.
- 5-gallon aluminum or stainless steel pot
- Rounded lid for the pot
- Metal or glass bowl that floats inside the pot
- Fill the large pot partially full of the impure water.
- Float the collection bowl on the water. The goal is to drip water from the inverted lid into this bowl, so make sure the bowl is large enough to catch the drips.
- Place the pot lid upside down on the pot. When you heat the water, water vapor will rise in the pot, condense into droplets on the lid, and fall into the collection bowl.
- Heat the pot. The process occurs more quickly if the water boils , but it’s okay if it only gets hot.
- If you have ice cubes, place them on top of the pot lid. The ice chills the lid of the pot and helps condense water vapor into liquid water.
- Use care when removing the lid from the pot so you don’t get burned by steam, the pot, or the hot water. Store the distilled water (the water in the collection bowl) in a clean container. Ideally, store the water in a sterile container (one immersed in boiling water) or dishwasher-cleaned container. Use a container meant for water storage so contaminants don’t leach into the clean water over time.
Alternative Collection Method
A better method is to collect the distilled water outside of the pot. Basically, this is a simple still. It is superior to the first method because it reduces the risk of contaminating the clean water with the “dirty” water and allows for continuous heating of the source water. One option is to place a funnel over the boiling water rather than a lid. Use plastic aquarium tubing or copper tubing to connect the end of the funnel to a collection bottle. Make sure the collection bottle is lower than the funnel so gravity can drain the water.
Distilled Water From Rain or Snow
Another way to get distilled water is to let Mother Nature do the work for you. Rain and snow are naturally distilled water. Water evaporates from the land, ocean, lakes, and rivers and condenses in the atmosphere to fall as precipitation. Precipitation does pick up particulates from the air, but it’s pure enough to drink except in highly polluted areas. Also, it’s important to collect rain or snow fresh from the sky and not off of trees or buildings.
Collect rain or snow in a clean container. Allow time for any sediment to fall to the bottom of the bowl. You can drink this water or further purify it by filtering it through a coffee filter or by boiling it.
Distill Water From Plants, Mud, or Urine
In a dire emergency, you may not have access to niceties like pots and fire. It’s still possible to distill water using a homemade solar still. This method of distillation uses the heat of the Sun to evaporate water that you can collect to drink. You can use any source of moisture, such as urine, dew, plants, damp soil, or sea water. However, be careful to avoid poisonous plants because volatile toxins may contaminate the distilled water. Cacti, ferns, and grasses are generally safe to use. The major disadvantage to this method is that it takes a long time to collect water.
- Dig a hole in the ground in a sunny location.
- Place a cup in the center of the bottom of the hole to collect distilled water.
- Pile damp non-toxic plants or moist soil around the outside of the cup.
- Cover the hole with a piece of plastic and secure it with rocks or soil. Try to seal the hole as well as you can to prevent moisture from escaping. The plastic traps the water and also traps heat via the greenhouse effect.
- Place a pebble or other small weight on the plastic right above the buried cup. As water evaporates, it condenses on the plastic and falls toward the depression, finally dripping into the cup.
- Don’t mess with your set-up except to drink water or add more plants or soil. Every time you unseal the plastic, you release moisture and slow down the process.

Use a Home Distillation Kit
It’s often cheaper to buy distilled water than make it yourself because it costs fuel or electricity to heat water. But, home distillation kits can be less expensive than bottled water, especially if you use sunlight (solar heat) to heat the water. Home distillation kits typically range in price from $100 to several hundred dollars. More expensive kits are used for labs or for processing large volumes of water.
Pros and Cons of Drinking Distilled Water
On the plus side, distilled water is safer to drink than contaminated water. It can save lives when the only available water is seawater, water from a river or stream, or a questionable public water supply. It also removes trace contaminants that are always present in a municipal water supply from the treatment process, including residual aluminum, chlorine, fluorine, and chloramines. Distillation removes radionuclides, heavy metals (including lead from some plumbing), and many organic compounds.
The high level of purification is also an argument against drinking distilled water, at least over the long term. Distillation demineralizes water, removing healthful minerals, such magnesium and calcium. These minerals are associated with positive health effects, especially for the cardiovascular system. If distilled water is the only source of drinking water, it’s important to get these minerals from other sources.
- Anjaneyulu, L.; Kumar, E. Arun; Sankannavar, Ravi; Rao, K. Kesava (13 June 2012). “Defluoridation of drinking water and rainwater harvesting using a solar still”. Industrial & Engineering Chemistry Research . 51 (23): 8040–8048. doi: 10.1021/ie201692q
- Fischetti, Mark (September 2007). “Fresh from the Sea”. Scientific American . 297 (3): 118–119. doi: 10.1038/scientificamerican0907-118
- Kozisek F. (1980). “Health risks from drinking demineralised water”. Nutrients in Drinking Water . World Health Organization. pp. 148–159. ISBN 92-4-159398-9.
- O’Meagher, Bert; Reid, Dennis; Harvey, Ross (2007). Aids to survival: a handbook on outback survival (25th ed.). Maylands, W.A.: Western Australia Police Academy. ISBN 978-0-646-36303-5.
- Taylor, F. Sherwood (1945). “The Evolution of the Still”. Annals of Science . 5 (3): 186. doi: 10.1080/00033794500201451
Related Posts
Your browser is not supported
Sorry but it looks as if your browser is out of date. To get the best experience using our site we recommend that you upgrade or switch browsers.
Find a solution
- Skip to main content
- Skip to navigation

- Back to parent navigation item
- Primary teacher
- Secondary/FE teacher
- Early career or student teacher
- Higher education
- Curriculum support
- Literacy in science teaching
- Periodic table
- Interactive periodic table
- Climate change and sustainability
- Resources shop
- Collections
- Remote teaching support
- Starters for ten
- Screen experiments
- Assessment for learning
- Microscale chemistry
- Faces of chemistry
- Classic chemistry experiments
- Nuffield practical collection
- Anecdotes for chemistry teachers
- On this day in chemistry
- Global experiments
- PhET interactive simulations
- Chemistry vignettes
- Context and problem based learning
- Journal of the month
- Chemistry and art
- Art analysis
- Pigments and colours
- Ancient art: today's technology
- Psychology and art theory
- Art and archaeology
- Artists as chemists
- The physics of restoration and conservation
- Ancient Egyptian art
- Ancient Greek art
- Ancient Roman art
- Classic chemistry demonstrations
- In search of solutions
- In search of more solutions
- Creative problem-solving in chemistry
- Solar spark
- Chemistry for non-specialists
- Health and safety in higher education
- Analytical chemistry introductions
- Exhibition chemistry
- Introductory maths for higher education
- Commercial skills for chemists
- Kitchen chemistry
- Journals how to guides
- Chemistry in health
- Chemistry in sport
- Chemistry in your cupboard
- Chocolate chemistry
- Adnoddau addysgu cemeg Cymraeg
- The chemistry of fireworks
- Festive chemistry
- Education in Chemistry
- Teach Chemistry
- On-demand online
- Live online
- Selected PD articles
- PD for primary teachers
- PD for secondary teachers
- What we offer
- Chartered Science Teacher (CSciTeach)
- Teacher mentoring
- UK Chemistry Olympiad
- Who can enter?
- How does it work?
- Resources and past papers
- Top of the Bench
- Schools' Analyst
- Regional support
- Education coordinators
- RSC Yusuf Hamied Inspirational Science Programme
- Science Education Policy Alliance
- RSC Education News
- Supporting teacher training
- Interest groups

- More navigation items
Practical videos | 14–16 years
- 1 Access free videos to support your teaching
- 2 Paper chromatography
- 3 Rates of reaction
- 4 Simple distillation
- 5 Enthalpy change of combustion
- 6 Conservation of mass
- 7 Electrolysis of aqueous solutions
- 8 Halogen displacement reactions
- 9 Identifying ions
- 10 Preparing a soluble salt
- 11 Reactivity series of metals
- 12 Simple titration
- 13 Temperature change (neutralisation)
- 14 Potable water
Simple distillation

- No comments
Use this separation technique to obtain pure water from a coloured solution
The value of experiencing live practical work cannot be overstated. Numerous studies provide evidence of its value in terms of learner engagement, understanding, results and the likelihood of continuing to study chemistry or work in a related field.
Use this video to complement live practical work, or to help learners understand the methods, equipment and skills when they cannot access the lab.
Source: © Royal Society of Chemistry
Investigate the separation of water from a coloured solution using this simple distillation video, including a step-by-step method, animation and suggested alternative method
Chapter titles: 00:10 Introduction to distillation; 01:07 Carrying out the experiment; 03:44 Animation; 04:10 Alternative method: Quickfit apparatus; 04:52 Testing the distillate.
- Teacher notes
Full teacher notes are available in the supporting resources booklet (also available in MS Word ), including ideas for how to use this video and the accompanying activites and answers to use as part of your teaching.
Get the resources
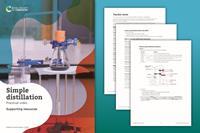
Supporting resources
Detailed teacher notes, learner activities and answers
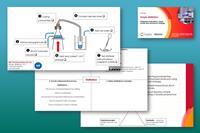
Learner slides
Integrated instructions, Frayer model and Johnstone's triangle
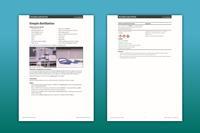
- Technician notes
Equipment, chemicals, hazards and disposal information
Notes on running the practical experiments
Ask learners to work in pairs. Demonstrate how to set up the equipment first (either in-person or via the video), so that you can emphasise health and safety issues. Remind learners that they must wear eye protection and direct them to the relevant student safety sheets (SSS).
Do not run the practical for too long as the ice-water can heat up and it is possible to get scalding steam coming out of the test tube. If this happens, learners will not get any solid in the flask that they are heating. You can show the solid at the end more safely using the Liebig condenser and quickfit apparatus. See the Preparation of an organic liquid practical video and technician notes for detailed instructions of this demonstration.
It is important that learners clamp the flask in the correct place and do not overtighten it. Learners can practise turning the Bunsen burner ( SSS092 ) flame down to ensure gentle boiling of the coloured solution. If they turn down the gas too quickly, the flame will go out and they will need to relight the Bunsen. When testing their sample, learners should be aware of anhydrous copper(II) sulfate’s hazards ( SSS040 ).
Use the video’s animation and Johnstone’s triangle , available in the PowerPoint slides , to help learners link their observations to what’s going on at the submicroscopic level.
Health, safety and technical notes
Read our standard health and safety guidance and carry out a risk assessment before running any live practical. Refer to SSERC/CLEAPSS Hazcards, recipe books and student safety sheets. Hazard classification may vary depending on supplier. Download the technician notes for the full equipment list, safety notes and disposal information.
- Place a clamp stand on a heatproof mat and set up a Bunsen burner on the stand and mat.
- Place a tripod and gauze above the Bunsen burner.
- Stand a conical flask on the gauze and carefully clamp the neck of the flask to keep it stable.
- Using a second clamp and boss, clamp a test tube and stand it in a beaker of ice-water.
- Measure out 20 cm 3 of the solution in a measuring cylinder and pour it into the conical flask.
- Add a couple of anti-bumping granules to the flask.
- Take the delivery tube and place the bung in the top of the conical flask and the other end of the delivery tube in the test tube in the beaker of ice-water.
- Light the Bunsen burner on the yellow safety flame, then open the air hole so you have a blue flame.
- Heat the solution until it boils, then turn down the Bunsen burner flame at the gas tap so it boils gently. Remove the Bunsen from under the flask if the solution starts to boil rapidly.
- When you have collected 1 cm 3 of distillate, stop heating and remove your sample from the beaker of ice-water. Take care when handling hot glassware as it can cause burns.
- Test your sample for water by putting a small spatula of white anhydrous copper(II) sulfate onto a watch glass and adding a few drops of the distillate.
Find the integrated instructions for this experiment in the PowerPoint slides .
Real-world contexts
- Read this CPD article to find relevant contemporary contexts, such as medicine and fragrances, to share with your learners and develop their appreciation of chemistry in their lives.
- Show your learners how astronauts survive in space by using compression distillation on their urine.
- Add depth to a sequence of lessons on separation techniques with the context of caffeine .
- Highlight different career pathways with Olivia’s job profile . She did a Scottish Vocational Qualification (SVQ) and is a senior laboratory technician who uses distillation in her work.
Learners will need to have a clear understanding of the following scientific terminology:
- Simple distillation – the process of separating a liquid from a solution through evaporation followed by condensation.
- Separation – the process of dividing a mixture up into its component parts.
- Solution – a mixture formed by a solute dissolved in solvent.
- Solvent – the liquid a solute (solid) dissolves in to form a solution.
- Solute – a substance that will dissolve in a solvent.
- Dissolve – when a solute mixes completely with a solvent to produce a solution.
- Soluble – a substance that will dissolve.
- Mixture – two or more different substances, not chemically joined together.
- Pure – a substance made of only one element or compound.
- Evaporate – a change of state from liquid to gas.
- Condense – a change of state from a gas to a liquid.
- Vapour – a gas or small drops of liquid suspended in a gas.
- Distillate – the liquid collected at the end of a distillation experiment.
You will find a template, example Frayer model and suggested answers for the term ‘distillation’ in the PowerPoint slides . Find more examples and tips on how to use Frayer models in your teaching.
Cross-curriculum links and skills
This practical develops:
- Accurate observation and measurement skills.
- Manipulative skills to set up and use complex apparatus.
- Problem-solving skills and finding solutions to common issues that occur during distillation.
Common misconceptions
Misconception: substances disappear when they dissolve. Evaporation shows this is not true. Use scientific language to avoid introducing the idea of chemicals disappearing. Carry out a quick experiment to show that the mass stays the same if you weigh a solvent and solute before and after they are mixed to form a solution.
Misconception: m any learners will say that sodium chloride is now a liquid since it has dissolved in water. Technically, it did not melt and undergo a state change into a liquid, rather it was pulled into solution. Highlight the differences between the states, such as ‘liquids’, and ‘aqueous/in solution’.
Misconception: a ll mixtures are separated using only one separating technique. Provide learners with examples to show this is not the case, eg a mixture of iron filings and sulfur can be separated by a magnet or water (the iron filings sink and the sulfur floats).
Misconception: e vaporation and boiling are the same thing. Use everyday contexts to explain the difference, eg a puddle dries up on a sunny day as water molecules evaporate (changes state from a liquid to a gas) but you don’t see bubbles in the water indicating that it is boiling. Use scientific language to emphasise their meaning and avoid confusion.
Misconception: f iltration can separate solutions. Carry out a quick demo to show that it can’t. Pour a solution into a filter funnel and paper. Observe the solution run through the filter paper into the conical flask unchanged. Point out that there is no residue left on the filter paper. Then repeat using a suspension.
Misconception: a solution is a single substance . Ask learners to make a solution by dissolving copper chloride or sodium chloride in water and then ask them to heat the solution until the water evaporates off leaving the copper chloride or sodium chloride crystals. Use scientific language to reinforce the idea that a solution is formed when a solute dissolves in a solvent.
Misconception: b oiling points increase as a substance is heated . Ask learners to make careful observations as they heat up some water until it boils. They should record the temperature at regular intervals and note down any observations about the liquid.
Misconception: t he boiling/condensation point is different . Eg if it boils at 100°C, it must condense at 99°C.
Misconception: w ater goes around the condenser. Demonstrate how water flows through outer sleeve of the condenser, going in at the lower end and out at the higher end to promote more effective cooling. Point out the condenser’s inner tube and explain that this is where the vapour is cooled and condenses back to a liquid, ie the distillate.
More resources
- Display the water cycle infographic in your classroom and make cross-curricular links to physics, biology and geography with the modelling activity.
- Carry out this experiment with your 14–16 year-old learners to extract limonene, used in cleaning products and as a botanical insecticide, from orange peel.
- Use the fractional distillation practical and put the infographic poster up to show how crude oil is separated.
Simple distillation supporting resources
Simple distillation technician notes, simple distillation slides, additional information.
The original video script, supporting resources and slides were written by Dorothy Warren. The technician notes were adapted by Sandrine Bouchelkia.

More Dorothy Warren
Collision theory and Maxwell–Boltzmann distribution curves
Rates of reaction | practical videos | 14–16 years
Teaching the bonding spectrum

More Sandrine Bouchelkia
Enthalpy change of combustion of ethanol | practical videos | 14–16 years
Paper chromatography | practical videos | 14–16 years

Access free videos to support your teaching

Paper chromatography

Rates of reaction

Enthalpy change of combustion

Conservation of mass

Electrolysis of aqueous solutions


Halogen displacement reactions

Identifying ions

Preparing a soluble salt

Reactivity series of metals

Simple titration

Temperature change (neutralisation)

Potable water
- 11-14 years
- 14-16 years
- Practical experiments
- Practical skills and safety
- Compounds and mixtures
- Properties of matter
- Applications of chemistry
Related articles

Preparation of an organic liquid | practical videos | 16–18 students
By Ian Davies and Sandrine Bouchelkia Five out of five
Video and supporting resources to support practical work based on synthesis of an organic liquid, the experiment includes the stages of preparation, separation and purification

Experiment with surface tension and curious convection currents
2024-12-16T06:46:00Z By Declan Fleming
Use this demonstration when teaching concentration gradients, diffusion and convection at 11–16

Scientists find hazardous pigments in tattoo ink
2024-11-29T08:30:00Z By Nina Notman
Use this science research context when studying instrumental methods with your 14–16 learners
No comments yet
Only registered users can comment on this article., more practical.
By Karen Marshall and Sandrine Bouchelkia
Video and resources investigating the heat energy change of combustion of ethanol
Video and resources showing how to separate colours in inks using paper chromatography
By Dorothy Warren and Sandrine Bouchelkia
Video and resources showing how the concentration of sodium thiosulfate solution affects its rate of reaction with hydrochloric acid
- Contributors
- Email alerts
Site powered by Webvision Cloud

Evaporation Experiment
What do bottled water and cloud have in common?
They both involve a process called evaporation.
Evaporation is an important step in the water cycle .
Warm water evaporates and turns into vapor.
In bottled water factories, water is boiled and vapors are collected to make the product.
In nature, drops of vapor gather to form clouds in the sky.
Try this experiment to see how evaporation happens.

Evaporation-Distillation Water Science
In this water cycle project, let's make our own distilled water using evaporation, one of the important properties of water.
- plastic food wrap
- a small, slightly weighty object (you can use things like a stuffed toy)
- food coloring (optional)
- a large bowl
- a small cup (make sure it's shorter than the large bowl)
- adult supervision
Instructions
- Pour warm water into the large bowl.
- Add food coloring if you want to see how the distilled water turns out different.
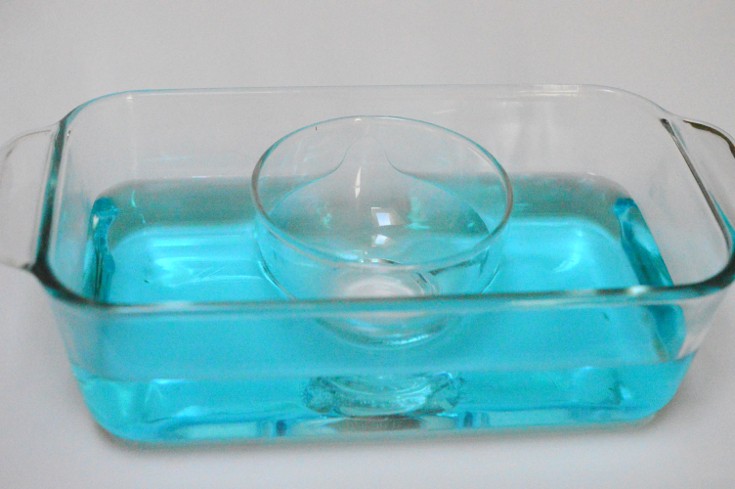
- Wrap the mouth of the bowl with cling wrap.

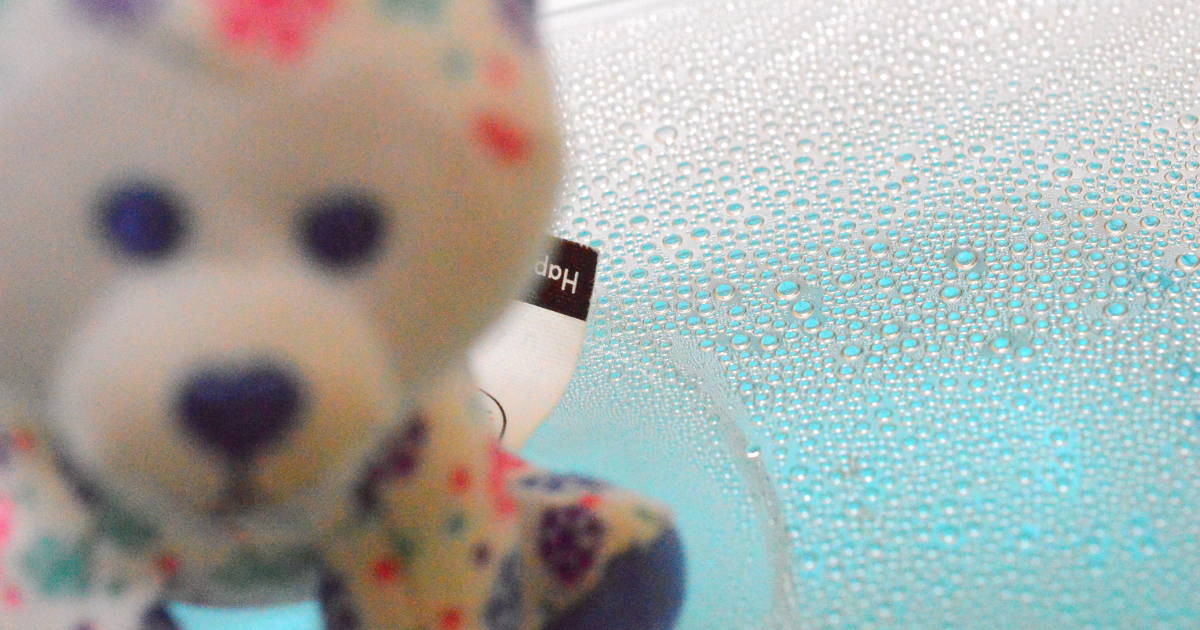
- Set the bowl under the sun and wait.
Did you try this project?
Follow us on Pinterest and share a photo!
When the vapor reaches the wrap which is colder, the vapor condenses and becomes water drops.
The water drops stick to the food wrap due to adhesion , water’s tendency to stick to objects .
The small item on the food wrap creates a slope for the water droplets to slide down and eventually drop into the small cup.
What the small cup collects is distilled water . This process of using evaporation to purify water is called distillation .
Commercial distilled water is made by boiling the water and condensing the steam .
Distillation can be used to purify water.
Most impurities, such as minerals, have melting points or boiling points much higher than water’s. Therefore, only water evaporates into water vapor leaving the impurities behind.
That is why in our experiment, the collected water is clear even though we put blue food coloring in the water at the beginning.
Although distillation is the main step in purifying water, our homemade distillation setup by itself cannot be used to make safe drinking water (unless drinking water is used as the “impure” water to start with, in which case you can safely drink away). Some contaminants such as pesticides have lower boiling points than water’s.
These volatile organic compounds (VOCs) become gases before water boils off and can become a part of the collected water.
Extra steps need to be taken to remove those VOCs before the distilled water is safe for consumption.

Similar Posts
Spatial Reasoning – Visualize Shapes Through Play
Spatial reasoning is an essential skill for math learning and can be acquired through training and practice. Here are a few…

Is Money Magnetic Experiment
If you live in the United States, you probably carry a stash of magnets in your wallet without even realizing…

Visual Spatial Activities
Paper House Geometry Visual Spatial Skills Learning Shapes And Patterns Activities

Shapes And Patterns Activities
Patterning is fundamental to mathematics because all math are virtually patterns and structures. Mathematical relations and transformations result in patterns and…
Volume Experiments With Water
Here is a hands-on STEM exercise for kids. It is fun for the kids and very easy to set up….

Science Projects – Experiments – STEM Activities
In an analysis of 6 studies including more than 35,000 kindergarten-ready children, it was found that comprehension of the world was…
Top Ten Projects
- Candle Race
- Home-Made Glue #1
- Soil Erosion
- Volcanic Gas
- Accelerate Rusting
- Vibrating Coin
- Mentos Soda Volcano
- Musical Bottles
- Human Battery Power
Latest Projects
- Sweet Erosion
- Your Planetary Age
- Exploding Ziploc
- Dehydrated Potato
- Homemade Windmill
Want to contribute?
Distillation of water.
To convert impure water into chemically pure water by distillation
Additional information
Distilled water finds its use in a wide range of applications where the natural dissolved salts that water normally contains are not desirable. Some of these are topping up lead acid batteries, preparing aseptic solutions in hospitals, automotive cooling systems, steam irons, etc. Distilled water is not however, considered to be suitable for human consumption on a regular basis simply because it lacks the natural beneficial minerals that ordinary drinking water contains. Besides, its bland taste is not very pleasant to the taste buds!
Sponsored Links
Required materials.
- Impure (muddy) water
- Distilling flask with thermometer
- Liebig’s condenser with stand
- Rubber cork / tubing
- Bunsen burner
- Tripod stand
- Stand with clamp
- Basin filled with sand
Estimated Experiment Time
Approximately 2 hours
Step-By-Step Procedure
- 1. Pour the muddy water into the distilling flask.
- 2. Use the stand to hold the flask in place, supported by the tripod stand.
- 3. Place the burner below this.
- 4. Connect the pout of the distilling flask to one end of the Liebig’s condenser.
- 5. Position the Liebig’s condenser using its stand so that it slopes downward slightly; its pout (other end) must open directly above the beaker.
- 6. Bring the muddy water to a boil and collect the condensed liquid for observation.
- Place the distilling flask in a sand basin before heating it – this will prevent vigorous boiling and damage thereof to the apparatus.
- Use the thermometer to monitor the temperature of the boiling liquid.
- The Liebig’s condenser is an integral part of the simple distillation process – it consists of two concentric layers of glass of which the outer layer has air vents that facilitate the cooling of the inner glass tube. This in turn allows condensation of vapors to take place within it.
Observation
The condensed liquid that gets collected in the beaker is clear as well as tasteless and odorless.
Pure and clear water can be obtained from an impure solution by simple distillation. In this process, the impure solution is heated so as to turn it into water vapor; this is later condensed in a Liebig’s condenser to form pure water. Hence distillation is one of the most complete methods of purifying water.
Take a moment to visit our table of Periodic Elements page where you can get an in-depth view of all the elements, complete with the industry first side-by-side element comparisons!
All Projects List
All categories.
home | about us | support | link to us | usage agreement | privacy policy | sitemap article resources -->
Copyright 2007, Sciencefairadventure.com. All Rights Reserved.

Want to create or adapt books like this? Learn more about how Pressbooks supports open publishing practices.
8 Purifying Water by Distillation
To purify groundwater or surface water using distillation and evaluate its effects.
Expected Learning Outcomes
- Purify a substance using distillation and vacuum filtration
- Evaluate the purity using experimental data.
Introduction
Distillation.
Distillation is the process in which a liquid is boiled and its vapor is re-condensed elsewhere to separate it from substances with a higher boiling point. When you vaporize a liquid, each component will have a different partial vapor pressure as determined by Raoult’s Law
[latex]P_A = \chi_A P_A^\circ[/latex]
where [latex]P_A^\circ[/latex] is the vapor pressure of the pure liquid, and [latex]\chi_A[/latex] is the mole fraction. [1] The more volatile compound (lower boiling point) will have a higher vapor pressure for the pure liquid, thus the more volatile compound will make up a larger proportion of the molecules in the vapor phase.
The liquid condensate is then collected. Since this was condensed from the vapor phase, it would have the same composition as the vapor phase (and hence contain more of the more volatile component.
The technique requires a heat source, a vessel containing the mixture to be separated, a short vapor pathway to a cooled condenser and a receiver for collecting the condensed liquid. A typical laboratory distillation apparatus is shown on the following figure. The condensed liquid collected is referred to as the distillate .
This is a traditional approach used to purify many different chemicals, including how things with a high alcohol content like rum, vodka, and whiskey are created from beer/wine [2] . But the most commonly used distilled chemical in the chemistry lab is distilled water [3] . In this lab, we will learn how to distill water from a natural source and then evaluate the purity of our distilled water by using a standard test kit from fish stores.
Experimental Procedure
Special equipment/supplies.
- 100 mL round-bottomed flask
- Alcohol thermometer
- Fish water test strips
- 150 mL of natural water
Some of the test kits will be shared, and it may be worth doing some steps out of order to be as efficient as possible.
Filtration and Preliminary Observations
- You will be provided with a sample of water obtained from somewhere in the area to purify. Invert the bottle a few times to thoroughly mix the water sample, then measure out approximately 150 mL of this water. Record the location and appearance of the water.
- Following the directions in the back matter , set up and vacuum filter approximately 100 mL of water (use a transfer pipet and wet the filter with a few mLs of your natural water sample). Record the appearance and smell (being careful to waft the fumes to your nose rather than to smell the product directly) of the filtrate (the water that passed through the filter) and anything stuck on the filter.
- AFTER starting the distillation, follow the directions on the test kits/strips to determine and record the concentrations of different impurities (nitrate, nitrite, carbonate, ammonia), hardness, and pH in the excess filtrate (~50 mL) and the excess original (unfiltered) sample (~50 mL).
- We are using a heating mantle (available from the back of the lab room) on a lab jack as our heating source.
- Keck clips are directional, put the larger side of the clip on the larger part of the joint.
- Make sure the 3-prong clamp on the condenser has the 2 prongs underneath the condenser, is centered on the condenser, and that the base of the ring-stand is beneath the condenser.
- Remember to connect the rubber tubing connected to the lower end of the condenser to the water supply and place the other end of the rubber tubing connected to the upper end of the condenser in the sink (if you have trouble getting the rubber tube to stay in the sink, tape it down).
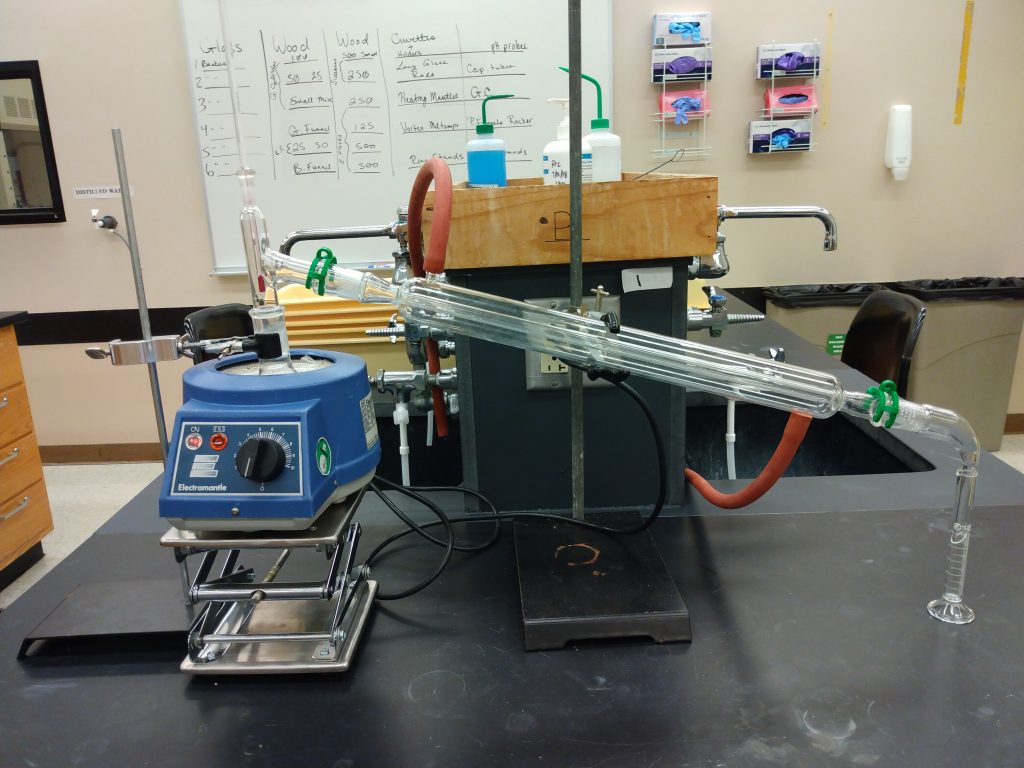
- Make a note of the temperature in the room according to your thermometer.
- Add 2 boiling chips to a 100 mL round-bottom flask and measure its mass (use a cork ring to keep the flask from rolling off the balance and breaking). Make a note of which balance you use for this step and be sure to use the same balance to weigh the round-bottom flask at the end of the distillation.
- Measure out approximately 50 mL of the filtered water into a graduated cylinder (record how much you measured out to the correct number of sig figs) and transfer it into the round-bottomed flask.
- Turn on the water supply and make sure that there is a continuous flow of water through the condenser, and that the outer jacket is almost completely filled with water. Check with your instructor to ensure that the distillation setup is assembled correctly before proceeding. Make note in your lab notebook about any changes your instructor has you make.
- To help keep track of the volume, you can use the rule of thumb that 20 drops = 1 mL, but at some point you will need a more precise measurement of the volume.
- Note that when distilling organic compounds, it’s important never to let the flask you’re distilling boil dry as some organic compounds can slowly form peroxides over time, which can explode if too much heat is applied (which can only happen after all of the solvent has boiled away). Since we’re distilling water, this isn’t an issue for us.
Characterizing the Product
- Describe the appearance and smell (wafting again) of the distillate.
- Measure the total volume of the distillate using a 50 mL graduated cylinder to the correct number of sig figs.
- Use test kits/strips to determine and record the concentrations of different impurities (nitrate, nitrite, carbonate, ammonia), hardness, and pH in the distillate.
- After letting it cool to room temperature, describe the appearance and smell (wafting again) of the residue in the round-bottomed flask and measure its mass using the exact same balance you used to measure its mass before distilling.
The waste from this experiment can be washed down the drain with plenty of water.
- The number of moles of A in the mixture divided by the total number of moles of particles in the mixture. ↵
- Technically, spirits like rum, vodka and whiskey aren't distilled from beer or wine, they're distilled from a beer/wine-like substance specially made to create the liquor. ↵
- The water we use is actually deionized, not distilled, which creates essentially the same product (pure water) through a completely different process. ↵
IU East Experimental Chemistry Laboratory Manual Copyright © 2022 by Yu Kay Law is licensed under a Creative Commons Attribution-NonCommercial 4.0 International License , except where otherwise noted.
Share This Book
- All Practicals
- Biology Practicals
- Chemistry Practicals
- Physics Practicals
- Filler Lessons
Distillation AKA: Separating salt and water

Salt is separated from water using a liebig condensor.
Related Links
- Liebig Condenser (AKA: Condenser)

IMAGES
COMMENTS
Take a drink of the water you have collected, distilled rather! What do you notice? How has the salt water solution separated?
In this experiment you will convert salt water into fresh water using distillation, which involves boiling a salt solution so that the water of the solution is turned into water vapor or water gas. Gather all the materials you will need for this science project.
Well, there are a few different ways to “purify” water to make it fresh and clean, one of which is called distillation. In the video above, you can see how distillation occurs with just a bit of heat.
Distillation is the second general method we have encountered for separating and purifying organic molecules. The purpose of distillation is to separate the components of a mixture of liquids by taking advantage of differences in their boiling points. Let’s consider a pure liquid at atmospheric pressure (1 atm, 760 mmHg).
Mar 30, 2020 · Distilled water is water purified by condensing water vapor into liquid water. Usually, the distillation process involves boiling impure water and collected the condensed vapor in a fresh container. However, you can obtain distilled water from damp soil, plants, snow, and rain, too.
Investigate the separation of water from a coloured solution using this simple distillation video, including a step-by-step method, animation and suggested alternative method
Dec 11, 2023 · In this water cycle project, let's make our own distilled water using evaporation, one of the important properties of water. Pour warm water into the large bowl. Add food coloring if you want to see how the distilled water turns out different. Put the empty small cup in the middle of the colored water. Wrap the mouth of the bowl with cling wrap.
Pure and clear water can be obtained from an impure solution by simple distillation. In this process, the impure solution is heated so as to turn it into water vapor; this is later condensed in a Liebig’s condenser to form pure water.
In this lab, we will learn how to distill water from a natural source and then evaluate the purity of our distilled water by using a standard test kit from fish stores. Some of the test kits will be shared, and it may be worth doing some steps out of order to be as efficient as possible.
Salt is separated from water using a liebig condensor. Using standard distillation equipment (see Fig 1), we can separate a saline solution into salt and water. The salt solution should always be made up using deionised (distilled) water.